Raspberry Pi as UniFi Controller
Our last house was big. Or at least, long. Long enough that your average router’s built-in WiFi wouldn’t reach every room properly. Since we moved in to that house in 2013, the wireless network I built predated today’s wonderful collection of mesh-based WiFi systems. The likes of the Netgear Orbi, Linksys Velop and Google Wifi devices didn’t yet exist. So I bought a bunch of Ubiquiti‘s UniFi kit (four access points in total) and spread them through the house.
This setup wasn’t as seamless or quick to set up as these new systems appear to be, but once configured it has been rock solid. The controller for these devices started life as the default install of Ubiquiti’s Java app on a Windows server, then later as a Docker image on a Synology Diskstation. For various reasons (mostly to do with constrained bandwidth) I’m not running that Synology or a powerful permanent server in the new house, but I still wanted a controller for the UniFi kit – especially as I intend to try their USG as a gateway device.
So, what were my options?
- Spin up a Linux box locally or in the cloud.
Not ideal – latency/bandwidth to the cloud is poor, and right now I don’t want a power hungry server running 24/7. - Buy the Ubiquiti Cloudkey – a small device that runs the controller on your local network.
Expensive for a single use device, and besides I think I can… - Build the controller system on a Raspberry Pi I already have kicking about.
That’ll do.
This is a very context specific decision. In a few months I’ll have a bunch more bandwidth, and will be running a server locally again, at that point a Hyper-V VM running Ubuntu will probably make more sense. Until then, let’s build what I am calling the UniPi!

I started with a clean copy of Raspbian Stretch Lite. While SSH used to be enabled by default on the Raspbian Pi releases, this has changed with Stretch. To enabled headless setup you’ll need to burn the image then put an empty file named ssh in the boot partition to enable ssh.
Boot the device and log in with the default credentials (pi/raspberry).
First: update all the things and make sure raspi-config is present.
sudo apt-get update && sudo apt-get install raspi-config -y
And then run the config tool:
sudo raspi-config
In the config tool, I did the following steps:
- Changed the hostname to
unipi. - Advanced Options -> Expand Filesystem
- Advanced Options -> Memory Split to choose 16MB – good for a headless config that’ll never see a monitor.
- Enabled Wait for Network at Boot.
There is no point this device being alive if it can’t see a network.
Once again, update all the things:
sudo apt-get update && sudo apt-get upgrade -y
And then upgrade the firmware on the Pi:
sudo apt-get install rpi-update && echo Y | sudo rpi-update
I rebooted after this step as by this point I’d reserved a specific IP in DHCP and wanted it to be picked up by the device.
Stretch Lite is missing dirmngr – required for downloading certificates and checking CRLs. This will be needed in the next step when we add keys while adding the UniFi repository to sources.
sudo apt-get install dirmngr
Now we can add the UniFi repository to the sources list:
echo 'deb http://www.ubnt.com/downloads/unifi/debian stable ubiquiti' | sudo tee -a /etc/apt/sources.list.d/ubnt.list > /dev/null
sudo apt-key adv --keyserver keyserver.ubuntu.com --recv C0A52C50
sudo apt-get update
And finally, install UniFi. It requires Java 8, so we do these together in one command. This step will add something like 500Mb of extra stuff.
sudo apt-get install unifi oracle-java8-jdk -y
We’ll also end up with a default mongodb server, which we don’t need – UniFi has its own – so we prevent it from starting.
sudo systemctl disable mongodb
sudo systemctl stop mongodb
Issue a reboot before you start the UniFi setup proper.
sudo reboot
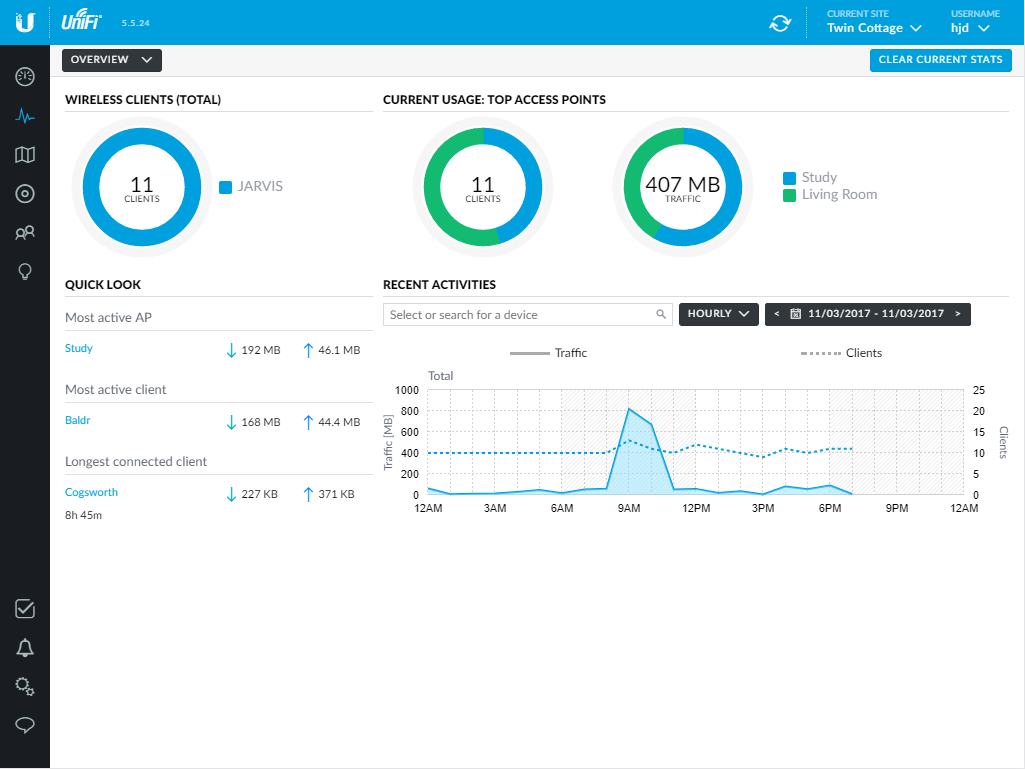
I was restoring the configuration from the Docker instance so didn’t need to follow the initial setup of the controller – the wizards make this very easy. Once my config was imported, the controller started to update the firmware on my devices, and I was up and running:

Next step is to configure the USG gateway – including intelligent load balancing between my lousy DSL and faster – but metered – 4G. I look forward to Gigaclear connecting me to make this step redundant!
Enjoy Reading This Article?
Here are some more articles you might like to read next: